Showing posts with label Baking. Show all posts

Monday, April 4, 2011

Things I really want to make...


Since we are on vacation this week (with our toes in the water and bums in the sand) I figured I would tease you with some of the things I am wanting/hoping to make sometime soon.  And, no, that picture is not from the trip we are on right now... I wish!  It's from our honeymoon last June.  Man I miss Playa Mujeres, Mexico! 

Back to the sweets... the way I decide what I'm planning to make is basically a free for all.  If I see something on a blog and it tugs at me enough I usually end up making it.  So what ends up happening is I have about 25 unread blog posts in my reader for weeks on end until I either 1) print all of the recipes out and marinate on them until one jumps out oat me; or 2)decide on one, print it out, and make it!

So here are some that are sitting stagnant in my reader right now.  They all look so darn good!  Maybe I'll make one while we're on vacation for us to enjoy :)  We'll see. 

Because I have not had the real thing (but am determined to visit the beautiful city home to these delicious confections one day):  http://eatliverun.com/oven-baked-beignets/

Because every southern girl needs to know how to make a good pecan pie (and I like things with a twist):  http://17andbaking.com/2011/03/15/coconut-pecan-why-not-pie-with-walnuts-and-toffee/

Because I haven't had one of these since high school and it's time to revisit:  http://www.acozykitchen.com/salted-caramel-rice-krispie-treats/

Because they sound good and I would probably feel very sophisticated eating these with some french press coffee (@Sarah) and reading a newspaper:  http://cupcakesandcashmere.com/cranberry-orange-scones/?utm_source=feedburner&utm_medium=feed&utm_campaign=Feed%3A+CupcakesAndCashmere+%28Cupcakes+and+Cashmere%29

Because, well, you already know my love for peanut butter and chocolatehttp://www.howsweeteats.com/2011/03/peanut-butter-stuffed-hot-fudge-cupcakes/?utm_source=feedburner&utm_medium=feed&utm_campaign=Feed%3A+howsweeteats%2FsmSp+%28How+Sweet+It+Is%29

Because the Hubby loves red velvet:  http://www.howsweeteats.com/2011/03/red-velvet-brownies-with-white-chocolate-frosting/?utm_source=feedburner&utm_medium=feed&utm_campaign=Feed:howsweeteats/smSpHowSweetItIs

Because I looooove anything with the word snickerdoodle in it and these remind me of my Chocolate Crack Cookies (even though they are far from cookies):  http://thepioneerwoman.com/tasty-kitchen-blog/2011/03/step-by-step-snickerdoodle-muffins/

Because... see above, oh and I die for anything lemon flavored:  http://www.culinaryconcoctionsbypeabody.com/2011/02/25/lemon-snickerdoodles/

Because omg I don't think my taste buds can handle this... and one of the Hubby's favorite cereals is Captain Crunch:  http://www.culinaryconcoctionsbypeabody.com/2011/03/11/peanut-butter-captain-crunch-marshmallow-brownie-bars/

Because one of the Hubby's favorite cookies I make is oatmeal scotchies... so maybe we should try these:  http://www.culinaryconcoctionsbypeabody.com/2011/03/14/oatmeal-scotchie-bars/


So there you have it.  That's what I'm craving to make right now.  I think one of these might work really well for baking on our trip.  Maybe you'll get to see it next week... y'all come back now, ya hear!

Tuesday, March 15, 2011

Drum roll please........ Cinnamony Sugar Pull-Apart Breakfast Bread

 
After seeing not one, but two different blog posts on this particular treat, I just had to make it.  And who better to "test it out" on than my in-laws, since they always love our breakfast treats.  Trying to describe it without you actually tasting it is difficult, but the best I can explain is a mix between monkey bread and french toast.  Yes, it's that good.  Seriously.

The really great thing about this recipe is that you don't really need any special tools.  Even before I was a "baker" I would have had everything I needed to make this.

First off, you are going to whisk together the whole wheat flour, 3/4 cups of the all-purpose flour, sugar, yeast, and salt in a large mixing bowl and set aside.  Then, whisk together the eggs in a small bowl and set aside.


In a small saucepan you are going to melt together the milk and butter until the butter has just completely melted.  Be sure to stir while heating so you don't burn the milk.  Remove from the heat and add water and vanilla extract and stir.  Let the mixture stand for two minutes or until it is between 115-125 degrees F.
 
Pour the milk mixture into the flour mixture and stir with a spatula.  After combined, pour in the eggs and stir until the eggs are incorporated into the batter.  Just keep on stirring until it is all well combined.  After it's well mixed, add the remaining 3/4 cup of all-purpose flour and stir with the spatula until it's well combined (about 2 minutes).  It's very very sticky.


Grease a large bowl well (I usually just spray it down really good with non-stick spray) and then place the dough in it to rise.  Cover the bowl with plastic wrap and a clean kitchen towel.  Place in a warm space and allow to rest/rise until doubled in size - 1 hour.  I put my rising dough in the oven at about 100 degrees (I just turn it on at 350 to warm up for about a minute and a half and then shut it off.... and Lord have mercy please don't forget to shut the oven off or you will have a major nightmare of messed up dough and possibly a melted bowl on your hands).  *Joy The Baker says that if you are making this in advance you can refrigerate the dough after this step.  I actually disagree with her.  I say you go all the way until the dough is ready to bake and then you refrigerate it.  The reason is that there is really no reason why you can't do that, and the baking process takes a little while (i.e. bring dough back to room temp. or close to room temp, bake for about 35 minutes, then let cool for about 15 minutes).


While the dough is rising you can mix together the sugar, cinnamon, nutmeg, brown sugar mixture.  Set that aside.  Then, melt 4 tablespoons of butter until browned (mess alert:  don't do this in the microwave for too long or it could explode... I kinda forgot it could do that, ha!).  Set the butter aside.  Then grease and flour a regular sized loaf pan (or Baker's Joy it) and set that aside too.


After the dough has finished rising, deflate it and knead 2 tbsp of flour into it.  Cover with a clean kitchen towl and let it rest for 5 minutes.  On a lightly floured, large work surface, use a rolling pin to roll out the dough.  Joy says it should be about 20in. x 12 in.  I just say get it as big as you can.


Next, use a pastry brush to spread the melted butter across all of the dough.  Then sprinkle with all of the sugar/cinnamon mixture.  Yummy.  So I got a little dough cutting happy and cut it before I brushed the butter and sprinkled the mixture... and I'm here to report that it works out fine either way :)  But it's definitely easier to do the brushing and sprinkling before you cut it.  Slice the dough vertically into six strips of the same size.  Then, stack the strips all together and slice that stack into six squares(ish).  You should have 36 square ish sized pieces of dough, give or take a few.


Now, take the individual stacks of six and place them into the loaf pan one stack at a time.  Now, take a kitchen towl and place it over the loaf pan and allow it to rise in a warm place for 45 minutes until it has almost doubled in size.  *After this step, I refrigerated the dough to be ready to bake the next morning.  But you could also continue from here and bake immediately after it is finished rising.  Just be sure to set out for an hour or hour and a half before you are ready to bake it if you decide to refrigerate it.


I went up to that last step the day before.  Then the in-laws came over and the Hubby cooked dinner for us.  Roasted leg of lamb with stuffed tomatoes, roasted asparagus, and homemade rosemary bread.  To.die.for.  Well most of it.  Everyone loved the lamb but me.  For some reason it was really gamey to me.  Weird.  Anyways, I loooooved the rest of it.  Especially the stuffed tomatoes.  I may just have to do a post on them one day.  They were ridiculous.  Here is a picture of our fest:


Picking back up the next morning, I brought the dough back to room temp.  Now time to bake it!  Place the rack in the center of the oven and preheat to 350 degrees F.  Then, place the loaf pan filled with the yummy looking flip-book of dough in the oven and bake for 30-35 minutes, until the top edges are very golden brown.


As Joy says, if the top is only lightly browned, the center is still not baked all the way... be patient people!


Remove from the oven and allow to sit out for about 15 minutes.  At this point you can make the optional icing.  I made it and used it but it definitely wasn't necessary... it just added a little something extra.  Mix together the powdered sugar, milk, and orange juice and set aside.  You can also add 3 oz. of cream cheese at room temp. if you want it to be a much thicker frosting.


Then, after running a butter knife around the edges, turn the bread onto a plate.  Then, if you care, you can invert that onto a serving platter or cake plate for it to be right side up.  We were a little impatient and didn't care... we just dug right in!


I piled about 5 pieces up on a plate with the eggs and bacon we ate.  After piling up the pieces, I just took a spoonful of the icing and drizzled it on top. 


Man... seriously, delicious.  Like OMG delicious.  Like everyone cleaned their plates delicious.  Like, there was a little leftover, I went to take a nap, came back out of the bedroom and the leftovers vanished delicious (yup, I was super sad... but my skinny jeans were oh so happy, they've been workin' hard lately).


I served it with eggs and bacon.  Dude... so good.


I hope you enjoyed this!  I would definitely give it a try for any sort of special breakfast/brunch occasion.  So worth the time you wait for this sucker to rise!

Print this recipe! 

Have a great week!

Monday, March 7, 2011

Dulce de Leche Cupcakes and some Italian fun!

 
I saw these cupcakes on Joy The Baker and knew I had to bake them immediately.  They just sounded so. freakin. good.  And looked so pretty (Of course, much prettier than how mine ended up looking, but hey, I'm trying.  I learned I need some bigger tips for my frosting bags so I can make my frosting look like hers... put it on my tab).


Remember our "cooking mentors" from this post of yore?  The Hubby and I had been wanting to get together with Cuz and S for a while now, and this weekend we finally had a day where we could all do dinner together.  Cuz and S invited us over, and I asked S if I could bring Dulce de Leche cupcakes for dessert.  She said that I could, and also told me that they were going to make pasta.  She's such a little liar!  Pasta was like 1/8th of all the food we ate.  Haha.  Seriously, we left their house and felt like we had just been to Italy and back in 4 hours.  They had some beautiful antipasti to start off (with too many things to even recount), then homemade pasta with homemade red sauce with yellow and red peppers, and then some sort of hanger/flank/skirt steak with deliciously prepared brussels sprouts! 
The antipasti sort of looked like a hybrid of this:


and this:


Not a single thing we ate was any less than to die for.  Seriously, my taste buds were on overload!  It was so incredibly good.  And to top everything off we had french press coffee and my cupcakes.  I woke up this morning and was actually pissed off at myself that I did not bring my camera to their house.  Everything was displayed so beautifully and I really think that would be the only way you could possibly understand how much wonderful food we had.  Plus, I secretly want to recreate the whole meal.  And now Adam wants a pasta maker attachment for my kitchen aid.  I told Cuz and S that every time we leave their house there are about 5 more things we "need" for our cooking and baking habit. 

Anyways, back to the cupcakes.  This is how Joy The Baker describes them:
"These cakes themselves are a brown sugar and buttermilk cake.  The addition of brown sugar mocks the dulce de leche flavors just slightly.  The cakes are more of a pound cake consistency and not so much a fluffy cake mix cupcake.  The frosting is a combination of three fine fats:  butter, cream cheese and dulce de leche."

And from what everyone told me who has had the pleasure ;) of eating one, that's pretty accurate.  The cake part of it is not very sweet and is definitely pound cake like, so the cake and frosting play off of each other to create this rich but not too sweet flavor.  I can't eat the frosting (I just had a VERY tiny bit on my cupcake), but from what I did try, it was amazing.

I, much like Joy The Baker, did not make my own Dulce de Leche.  I was a little afraid after she described how to make it, so I threw down 9 bones to buy the premade stuff at Whole Foods.  It was definitely more expensive than I thought it would be, but I still think it was worth it.  Maybe one day I'll give it a try.  I saw in the comments on Joy The Baker's post that there is a Pioneer Woman recipe to make Dulce de Leche pretty easily.  

Start by placing your oven racks in the middle and upper portion of the oven.  Then, preheat the oven to 350 degrees F.  Line cupcake pans.  I decided to do 18 regular sized cupcakes and 24 mini cupcakes.  There was still enough batter left to make at least 3 more regular sized cupcakes.  Place these aside for later.  Next, in a medium bowl, whisk together flour, cornstarch, baking powder, baking soda and salt.  Set this aside also.


Place butter and sugars in the large bowl of a stand mixer and beat on medium with the paddle attachment for about three minutes, until it looks fluffy.  Stop mixing, scrape the sides of the bowl, and add one egg.  Beat on medium for a minute or so and add the remaining two eggs, one at a time, beating a minute between each.  After all eggs are combined into the mixture, scrape the sides and then beat in the vanilla.


Next, add half of the flour mixture to the butter/sugar/egg mixture.  Beat on low and then slowly pour in the buttermilk (which, for me, was a milk and lemon juice mixture).


Beat until just combined and then stop mixing, scrape down the sides, and add the rest of the flour mixture.  Beat until just combined.


Then, remove the bowl from the stand mixture and finish stirring with a spatula.  Do not over-mix.


Take the batter and fill the lined cupcake pans 2/3 of the way full.


For the regular sized cupcakes, I used a heaping cookie scoop to transfer the batter to the lined pan.


For the mini cupcakes, I used a heaping tablespoon to transfer the batter to the lined mini pan.

 
Bake the regular cupcakes for 18-20 minutes (or until a toothpick comes out clean) and the mini cupcakes for 9-12 minutes or a clean toothpick.


Let the cupcakes cool completely (in the pan or in the pan for the first 5-10 minutes and then on a cooling rack).  Don't even think about frosting until they are completely cool to the touch.


While they are cooling, make the frosting.  Mmmmm.  If I could eat dairy, I probably would have eaten bowls full of this stuff.  It smelled SO good.  Gah.  Stupid lactose intolerance.  Haha, that reminds me.  Last night at dinner, S said to me about my lactose intolerance, "I really hope they fix that for you, because that just sucks."  I totally agree S... actually I couldn't agree more.  But I'm not holding my breath.  Plus, I really don't want to have to buy all new clothing, which I'm pretty sure would be one of many outcomes of overcoming that problem.  ;)

To make the frosting, place the room temperature cream cheese in the bowl of your stand mixture... I know, I didn't want to clean the bowl that quickly either, just do it.  It's worth it in the end, I promise.  Beat the cream cheese on medium for about 30 seconds until it's soft and almost fluffy.  Stop mixing, scrape the sides, and add the room temperature butter and the dulce de leche.  Beat on medium until well combined.  Stop the mixer and add the salt and powdered sugar.  First beat on the lowest speed until the confectioners sugar is moistened, then beat on medium for about 2 1/2 - 3 minutes, until its light and fluffy.


Either spoon or pipe (with a frosting bag) onto the cooled cupcakes.


Lastly, heat a couple of tablespoons of the dulce de leche.  I did mine in the microwave in the glass jar, but you could also do it over low heat in a small saucepan.


Then take a spoon and drizzle it over the frosted cupcakes.


Then I, like Joy The Baker, topped them off with "cupcake gems", or round sprinkles.  So pretty!


I placed the cupcakes in the fridge for 45 minutes or so to set the frosting.


You can store them in the fridge because of the frosting, or not, but be sure to bring them back to room temp. before you serve.


Dulce de Leche Cupcakes!


For the Cupcakes:

3 cups all-purpose flour
1/4 cup cornstarch
1 1/2 teaspoons baking powder
1 1/2 teaspoons baking soda
1 teaspoon salt
3/4 cup (1 1/2 sticks) unsalted butter, room temperature
1 cup brown sugar
1/2 cup granulated sugar
1 teaspoon pure vanilla extract
3 large eggs
1 1/2 cup buttermilk (to make your own, read this - and you can use regular milk too!)

For the Frosting:

1/2 cup (1 stick) unsalted butter, softened
8 ounces cream cheese, softened
3/4 cup dulce de leche, plus more for drizzling
1/4 teaspoon salt
2 1/2 to 3 cups powdered sugar

Directions:
Start by placing your oven racks in the middle and upper portion of the oven.  Then, preheat the oven to 350 degrees F.  Line cupcake pans (makes ~24 regular sized cupcakes). Place these aside for later.  Next, in a medium bowl, whisk together flour, cornstarch, baking powder, baking soda and salt.  Set this aside also.

Place butter and sugars in the large bowl of a stand mixer and beat on medium with the paddle attachment for about three minutes, until it looks fluffy.  Stop mixing, scrape the sides of the bowl, and add one egg.  Beat on medium for a minute or so and add the remaining two eggs, one at a time, beating a minute between each.  After all eggs are combined into the mixture, scrape the sides and then beat in the vanilla.

Next, add half of the flour mixture to the butter/sugar/egg mixture.  Beat on low and then slowly pour in the buttermilk (which, for me, was a milk and lemon juice mixture).  Beat until just combined and then stop mixing, scrape down the sides, and add the rest of the flour mixture.  Beat until just combined.  Then, remove the bowl from the stand mixture and finish stirring with a spatula.  Do not over-mix.

Take the batter and fill the lined cupcake pans 2/3 of the way full.  Bake the regular cupcakes for 18-20 minutes (or until a toothpick comes out clean) and the mini cupcakes for 9-12 minutes or a clean toothpick.
Let the cupcakes cool completely.

Make the frosting.  Place the room temperature cream cheese in the bowl of your stand mixture.  Beat the cream cheese on medium for about 30 seconds until it's soft and almost fluffy.  Stop mixing, scrape the sides, and add the room temperature butter and the dulce de leche.  Beat on medium until well combined.  Stop the mixer and add the salt and powdered sugar.  First beat on the lowest speed until the confectioners sugar is moistened, then beat on medium for about 2 1/2 - 3 minutes, until its light and fluffy.

Either spoon or pipe (with a frosting bag) onto the cooled cupcakes.

Lastly, heat a couple of tablespoons of the dulce de leche.  I did mine in the microwave in the glass jar, but you could also do it over low heat in a small saucepan.  Then take a spoon and drizzle it over the frosted cupcakes.  Then, if you want, top them off with "cupcake gems", or round sprinkles.  So pretty!

I placed the cupcakes in the fridge for 45 minutes or so to set the frosting.  You can store them in the fridge because of the frosting, or not, but be sure to bring them back to room temp. before you serve.

Enjoy my friends!  The Hubs said these were the best cupcakes I've made yet.  Pretty sure that means you should try them... NOW!  :)

Tuesday, March 1, 2011

Peanut Butter Sandwich Cookies (Homemade Do-si-dos)

After having a heck of a week last week, followed by my weekend plans being completely foiled, I decided I needed to do some baking to cheer me up!  And in case you care, I'm pretending last week never happened.  So, in my mind, Saturday was a new start with some new cookies to try!

I know I told you how much my father-in-law loves peanut butter... but what I didn't tell you is that I love it too, like a lot.  :-)  And between me and the Hubby, if we were left in a room with a jar of peanut butter and a spoon, there may or may not be a fight.  We really like it.  So these cookies were the perfect pick-me-up.


To start, I preheated the oven to 350 degrees F.  Remember to put out the butter at least an hour in advance to bring to room temperature. 

We will start with the cookies first.  In a medium bowl, whisk together the flour, baking powder, baking soda, and salt and then set aside.


Next, in a large bowl, cream together butter and peanut butter.


Beat in the sugars until fluffy. 


Then, add in eggs one at a time, making sure each is completely mixed in before adding the next.  Then stir in vanilla.  Continue to mix on a low speed so you can mix in the flour slowly.  After the flour is incorporated, mix in the oats.  Make sure the mixture is well combined.


Now, on a parchment or silpat lined baking sheet, drop heaping teaspoonfuls of batter about 2 inches apart (because they will spread a good bit).


Now, I know you may remember me talking crap about silpat's here.  Well, I'm here to take back my smack talking.  Gasp!!  I had a credit to Amazon and decided to try one.  Insert foot in mouth... they actually are awesome!  The crazy thing is, the two batches of cookies baked on the silpat not only were baked more evenly, but came off the silpat SUPER easy.  And cleaning that thing is a cinch.  So I won't be talking crap about them anymore.  Promise.


Any who, bake for about 10 minutes until the edges start to slightly brown.


My first batch (on the bottom oven shelf with silpat) was done at exactly 10 minutes, but the batch I put in halfway during the first batch took 11 minutes (it was on the top shelf with parchment).


Oh, and one more thing about this, I need to warn you that this recipe makes an obscene amount of cookies.  I ended up making three pans (~60 individual cookies) and then throwing in the towel, but I probably could have made at least two more pans worth!  That's a crap ton o' cookies!  Even when I sandwiched them I still had about 30 cookies!  Below is my leftover batter after making 60 cookies!


Cool on the pan for about 5 minutes, then transfer to a wire rack for the rest of the cooling.


The original recipe calls for poking holes in the "top" cookies to make them look like the GS cookies.  I tried this and, to be frank, I thought it looked pretty stupid.  Haha!  Really, no joke:


So I decided not to do that with the following two batches.

Once you have made all the cookies and they are cooling, make the filling.  In a large bowl, cream together smooth peanut butter, butter, and confectioners sugar until completely smooth.  You don't want to use the kind of natural peanut butter that needs to be refrigerated because it likely won't be creamy enough.  I used Jif Natural Creamy Peanut Butter, that does not require refrigeration, and it worked great.

Now that you have your filling, flip half of your cookies over so their bottoms are showing (hehe).  These are the cookies you are going to put the filling on.  The right side up cookies are going to be the tops of the sandwiches.


Place 1-2 tsp of the filling onto the upside-down cookies.  They kinda look like giant Hershey kisses!  :)


Then put the top cookies on (and push down gently) to make the sandwiches.


That's it!  Be sure you have plenty of people to share these with... if not it could be dangerous because they are delicious!


Print this recipe!

Enjoy my friends!  Happy Girl Scout Cookies month ;)

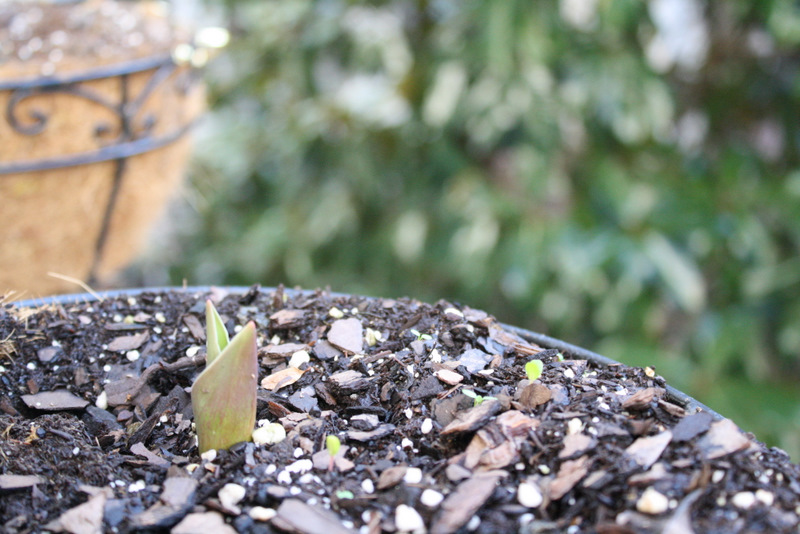
Oh and for those of you who care, I found out Sunday that I am not a black thumb after all!  Yipee!!  It's tulip time:


I'm DYING for it to bloom!  But I  think I still have a little while.  Don't you just LOOOVE Spring?!