So in a speedy catch-you-up from where I left off last (three and a half months ago, woops!)... two weeks after my last post I accepted a job in Charleston (!), which was hugely important for us to be able to live semi-comfortably. Then about two months after my last post Adam finished intern year (the picture below is him holding his icky intern year schedule with all the rotations marked off... a huge feat!), we packed up our lives, stuffed everything in a moving truck, spent the last night in our first apartment together sleeping on air mattresses (see proof below),
attended a good friend of mine's wedding while our moving truck was being driven to Charleston by my father-in-law,
arrived in Charleston to already moved in furniture that night - thanks to awesome movers and awesome parents, went to brunch and walked around the next morning on our first full day as South Carolina residents,
and realized we had been majorly down graded in the kitchen department (and yes that's our pantry and laundry room in that teeny tiny closet in the back... but regardless of the lack of counter space, you know I made room for my precious kitchen aid!),
(whoa that's small! can I get a wha whaa?), but made the best of our new place.
So here we are, FINALLY starting to feel settled, slowly making friends, slowly getting to know the area. I think Atlanta and Georgia will always be home to us, but I can't lie... I LOVE living by the beach. I still miss my sweet girlfriends who are now scattered all over the country, and no one will ever be able to replace those girls and the bonds I have with them, but I'm hopeful to make some new friends and feel like we have a great life that we enjoy living while we are here in Charleston.
I'm so sorry I left you hanging for the past 3 1/2 months, but sometimes life gets in the way. Hopefully we will get into a routine, and hopefully that routine will include some blogging about all the delicious baked goods you know I've been making over the past month and a half since we've moved! :-) I'm doing my best, so hang in there and we'll get back at it.
Cheers to change!
Showing posts with label misc.. Show all posts
Friday, August 19, 2011
Monday, April 4, 2011
Things I really want to make...
Since we are on vacation this week (with our toes in the water and bums in the sand) I figured I would tease you with some of the things I am wanting/hoping to make sometime soon. And, no, that picture is not from the trip we are on right now... I wish! It's from our honeymoon last June. Man I miss Playa Mujeres, Mexico!
Back to the sweets... the way I decide what I'm planning to make is basically a free for all. If I see something on a blog and it tugs at me enough I usually end up making it. So what ends up happening is I have about 25 unread blog posts in my reader for weeks on end until I either 1) print all of the recipes out and marinate on them until one jumps out oat me; or 2)decide on one, print it out, and make it!
So here are some that are sitting stagnant in my reader right now. They all look so darn good! Maybe I'll make one while we're on vacation for us to enjoy :) We'll see.
Because I have not had the real thing (but am determined to visit the beautiful city home to these delicious confections one day): http://eatliverun.com/oven-baked-beignets/
Because every southern girl needs to know how to make a good pecan pie (and I like things with a twist): http://17andbaking.com/2011/03/15/coconut-pecan-why-not-pie-with-walnuts-and-toffee/
Because I haven't had one of these since high school and it's time to revisit: http://www.acozykitchen.com/salted-caramel-rice-krispie-treats/
Because they sound good and I would probably feel very sophisticated eating these with some french press coffee (@Sarah) and reading a newspaper: http://cupcakesandcashmere.com/cranberry-orange-scones/?utm_source=feedburner&utm_medium=feed&utm_campaign=Feed%3A+CupcakesAndCashmere+%28Cupcakes+and+Cashmere%29
Because, well, you already know my love for peanut butter and chocolate: http://www.howsweeteats.com/2011/03/peanut-butter-stuffed-hot-fudge-cupcakes/?utm_source=feedburner&utm_medium=feed&utm_campaign=Feed%3A+howsweeteats%2FsmSp+%28How+Sweet+It+Is%29
Because the Hubby loves red velvet: http://www.howsweeteats.com/2011/03/red-velvet-brownies-with-white-chocolate-frosting/?utm_source=feedburner&utm_medium=feed&utm_campaign=Feed:howsweeteats/smSpHowSweetItIs
Because I looooove anything with the word snickerdoodle in it and these remind me of my Chocolate Crack Cookies (even though they are far from cookies): http://thepioneerwoman.com/tasty-kitchen-blog/2011/03/step-by-step-snickerdoodle-muffins/
Because... see above, oh and I die for anything lemon flavored: http://www.culinaryconcoctionsbypeabody.com/2011/02/25/lemon-snickerdoodles/
Because omg I don't think my taste buds can handle this... and one of the Hubby's favorite cereals is Captain Crunch: http://www.culinaryconcoctionsbypeabody.com/2011/03/11/peanut-butter-captain-crunch-marshmallow-brownie-bars/
Because one of the Hubby's favorite cookies I make is oatmeal scotchies... so maybe we should try these: http://www.culinaryconcoctionsbypeabody.com/2011/03/14/oatmeal-scotchie-bars/
So there you have it. That's what I'm craving to make right now. I think one of these might work really well for baking on our trip. Maybe you'll get to see it next week... y'all come back now, ya hear!
Thursday, March 17, 2011
Why do they do this to me???
Seriously... putting these guys out a little over two weeks before our beach vacation is torture for me! Why must you do this to me Cadbury? Because I just can't get with the "bikini body" program right now, I made a deal with my in-laws and the Hubby that there will be no judging what so ever at the beach. While I wish I owned a one-piece and my bikinis may end up giving me muffin tops, I say screw the pressure. I'm going with it and I'm eating as many d**n Cadbury eggs as I want... they are only around for one month a year! Who's with me?!
Monday, March 7, 2011
Dulce de Leche Cupcakes and some Italian fun!
I saw these cupcakes on Joy The Baker and knew I had to bake them immediately. They just sounded so. freakin. good. And looked so pretty (Of course, much prettier than how mine ended up looking, but hey, I'm trying. I learned I need some bigger tips for my frosting bags so I can make my frosting look like hers... put it on my tab).
Remember our "cooking mentors" from this post of yore? The Hubby and I had been wanting to get together with Cuz and S for a while now, and this weekend we finally had a day where we could all do dinner together. Cuz and S invited us over, and I asked S if I could bring Dulce de Leche cupcakes for dessert. She said that I could, and also told me that they were going to make pasta. She's such a little liar! Pasta was like 1/8th of all the food we ate. Haha. Seriously, we left their house and felt like we had just been to Italy and back in 4 hours. They had some beautiful antipasti to start off (with too many things to even recount), then homemade pasta with homemade red sauce with yellow and red peppers, and then some sort of hanger/flank/skirt steak with deliciously prepared brussels sprouts!
The antipasti sort of looked like a hybrid of this:
and this:
Anyways, back to the cupcakes. This is how Joy The Baker describes them:
"These cakes themselves are a brown sugar and buttermilk cake. The addition of brown sugar mocks the dulce de leche flavors just slightly. The cakes are more of a pound cake consistency and not so much a fluffy cake mix cupcake. The frosting is a combination of three fine fats: butter, cream cheese and dulce de leche."
And from what everyone told me who has had the pleasure ;) of eating one, that's pretty accurate. The cake part of it is not very sweet and is definitely pound cake like, so the cake and frosting play off of each other to create this rich but not too sweet flavor. I can't eat the frosting (I just had a VERY tiny bit on my cupcake), but from what I did try, it was amazing.
I, much like Joy The Baker, did not make my own Dulce de Leche. I was a little afraid after she described how to make it, so I threw down 9 bones to buy the premade stuff at Whole Foods. It was definitely more expensive than I thought it would be, but I still think it was worth it. Maybe one day I'll give it a try. I saw in the comments on Joy The Baker's post that there is a Pioneer Woman recipe to make Dulce de Leche pretty easily.
Start by placing your oven racks in the middle and upper portion of the oven. Then, preheat the oven to 350 degrees F. Line cupcake pans. I decided to do 18 regular sized cupcakes and 24 mini cupcakes. There was still enough batter left to make at least 3 more regular sized cupcakes. Place these aside for later. Next, in a medium bowl, whisk together flour, cornstarch, baking powder, baking soda and salt. Set this aside also.
Place butter and sugars in the large bowl of a stand mixer and beat on medium with the paddle attachment for about three minutes, until it looks fluffy. Stop mixing, scrape the sides of the bowl, and add one egg. Beat on medium for a minute or so and add the remaining two eggs, one at a time, beating a minute between each. After all eggs are combined into the mixture, scrape the sides and then beat in the vanilla.
Next, add half of the flour mixture to the butter/sugar/egg mixture. Beat on low and then slowly pour in the buttermilk (which, for me, was a milk and lemon juice mixture).
Beat until just combined and then stop mixing, scrape down the sides, and add the rest of the flour mixture. Beat until just combined.
Then, remove the bowl from the stand mixture and finish stirring with a spatula. Do not over-mix.
Take the batter and fill the lined cupcake pans 2/3 of the way full.
For the regular sized cupcakes, I used a heaping cookie scoop to transfer the batter to the lined pan.
For the mini cupcakes, I used a heaping tablespoon to transfer the batter to the lined mini pan.
Bake the regular cupcakes for 18-20 minutes (or until a toothpick comes out clean) and the mini cupcakes for 9-12 minutes or a clean toothpick.
Let the cupcakes cool completely (in the pan or in the pan for the first 5-10 minutes and then on a cooling rack). Don't even think about frosting until they are completely cool to the touch.
While they are cooling, make the frosting. Mmmmm. If I could eat dairy, I probably would have eaten bowls full of this stuff. It smelled SO good. Gah. Stupid lactose intolerance. Haha, that reminds me. Last night at dinner, S said to me about my lactose intolerance, "I really hope they fix that for you, because that just sucks." I totally agree S... actually I couldn't agree more. But I'm not holding my breath. Plus, I really don't want to have to buy all new clothing, which I'm pretty sure would be one of many outcomes of overcoming that problem. ;)
To make the frosting, place the room temperature cream cheese in the bowl of your stand mixture... I know, I didn't want to clean the bowl that quickly either, just do it. It's worth it in the end, I promise. Beat the cream cheese on medium for about 30 seconds until it's soft and almost fluffy. Stop mixing, scrape the sides, and add the room temperature butter and the dulce de leche. Beat on medium until well combined. Stop the mixer and add the salt and powdered sugar. First beat on the lowest speed until the confectioners sugar is moistened, then beat on medium for about 2 1/2 - 3 minutes, until its light and fluffy.
Either spoon or pipe (with a frosting bag) onto the cooled cupcakes.
Lastly, heat a couple of tablespoons of the dulce de leche. I did mine in the microwave in the glass jar, but you could also do it over low heat in a small saucepan.
Then take a spoon and drizzle it over the frosted cupcakes.
Then I, like Joy The Baker, topped them off with "cupcake gems", or round sprinkles. So pretty!
I placed the cupcakes in the fridge for 45 minutes or so to set the frosting.
You can store them in the fridge because of the frosting, or not, but be sure to bring them back to room temp. before you serve.
Dulce de Leche Cupcakes!
For the Cupcakes:
3 cups all-purpose flour
1/4 cup cornstarch
1 1/2 teaspoons baking powder
1 1/2 teaspoons baking soda
1 teaspoon salt
3/4 cup (1 1/2 sticks) unsalted butter, room temperature
1 cup brown sugar
1/2 cup granulated sugar
1 teaspoon pure vanilla extract
3 large eggs
1 1/2 cup buttermilk (to make your own, read this - and you can use regular milk too!)
For the Frosting:
1/2 cup (1 stick) unsalted butter, softened
8 ounces cream cheese, softened
3/4 cup dulce de leche, plus more for drizzling
1/4 teaspoon salt
2 1/2 to 3 cups powdered sugar
Directions:
Start by placing your oven racks in the middle and upper portion of the oven. Then, preheat the oven to 350 degrees F. Line cupcake pans (makes ~24 regular sized cupcakes). Place these aside for later. Next, in a medium bowl, whisk together flour, cornstarch, baking powder, baking soda and salt. Set this aside also.Place butter and sugars in the large bowl of a stand mixer and beat on medium with the paddle attachment for about three minutes, until it looks fluffy. Stop mixing, scrape the sides of the bowl, and add one egg. Beat on medium for a minute or so and add the remaining two eggs, one at a time, beating a minute between each. After all eggs are combined into the mixture, scrape the sides and then beat in the vanilla.
Next, add half of the flour mixture to the butter/sugar/egg mixture. Beat on low and then slowly pour in the buttermilk (which, for me, was a milk and lemon juice mixture). Beat until just combined and then stop mixing, scrape down the sides, and add the rest of the flour mixture. Beat until just combined. Then, remove the bowl from the stand mixture and finish stirring with a spatula. Do not over-mix.
Take the batter and fill the lined cupcake pans 2/3 of the way full. Bake the regular cupcakes for 18-20 minutes (or until a toothpick comes out clean) and the mini cupcakes for 9-12 minutes or a clean toothpick.
Let the cupcakes cool completely.
Make the frosting. Place the room temperature cream cheese in the bowl of your stand mixture. Beat the cream cheese on medium for about 30 seconds until it's soft and almost fluffy. Stop mixing, scrape the sides, and add the room temperature butter and the dulce de leche. Beat on medium until well combined. Stop the mixer and add the salt and powdered sugar. First beat on the lowest speed until the confectioners sugar is moistened, then beat on medium for about 2 1/2 - 3 minutes, until its light and fluffy.
Either spoon or pipe (with a frosting bag) onto the cooled cupcakes.
Lastly, heat a couple of tablespoons of the dulce de leche. I did mine in the microwave in the glass jar, but you could also do it over low heat in a small saucepan. Then take a spoon and drizzle it over the frosted cupcakes. Then, if you want, top them off with "cupcake gems", or round sprinkles. So pretty!
I placed the cupcakes in the fridge for 45 minutes or so to set the frosting. You can store them in the fridge because of the frosting, or not, but be sure to bring them back to room temp. before you serve.
Enjoy my friends! The Hubs said these were the best cupcakes I've made yet. Pretty sure that means you should try them... NOW! :)
Wednesday, February 23, 2011
Sweet Potato Chips - A yummy AND healthy side
Because the craziness of last week has spilled into this week, I'm going to post a "back-up" post that I had waiting for a week like this. I just feel like I can't catch up and am about as tired as I can ever remember being. Plus the Hubby has a cold :( Sorry to postpone the second Valentine's post. I promise it will be up within the next week.
*****
I'm not really sure when or where I stumbled across this "recipe". I use the term recipe loosely because these are easy to tweak and there is not a whole lot to them. I think they may have been a weight watchers recipe. I know it's not a "baked item", but these are definitely something you should add to your rotation!
All you need is a large baking pan, aluminum foil (optional), one medium sweet potato per person, non-stick spray, a sea salt grinder, and a food processor or mandoline slicer.
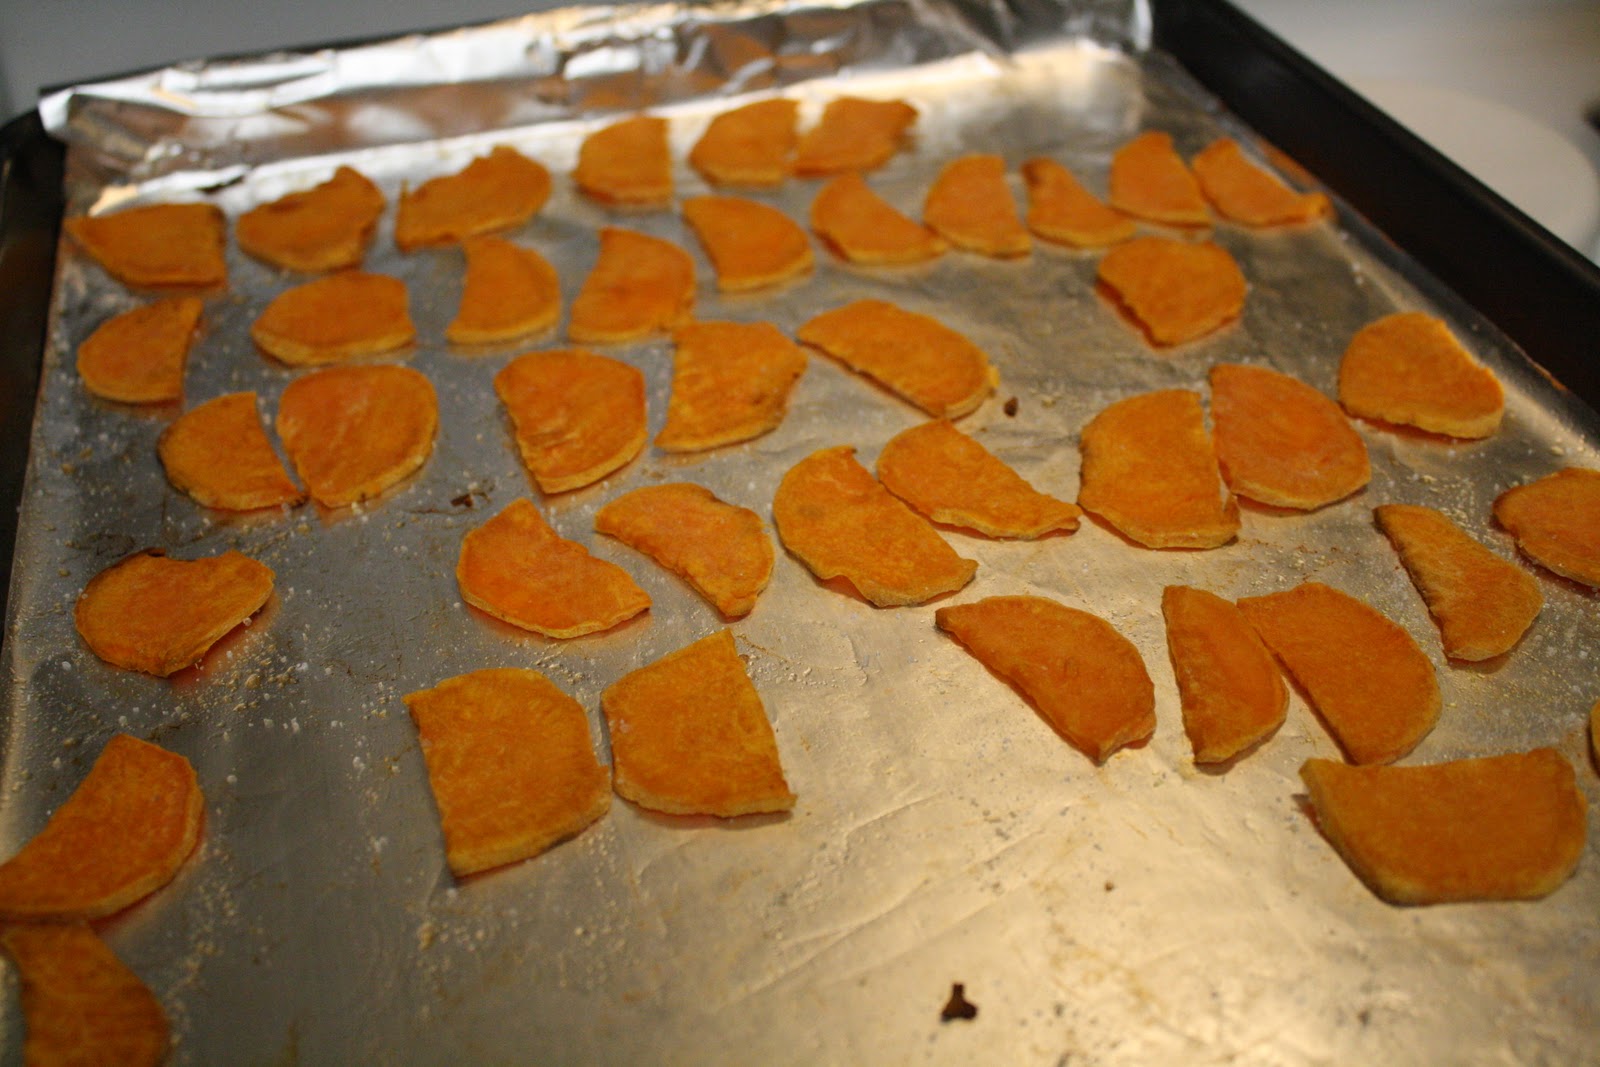
Preheat your oven to 400 or 425 degrees (for us it depends on what we are cooking with it, but if there is nothing in the oven do 425). First you are going to peel the skin off the sweet potatoes. Now that you have the whole sweet potato with no skin, cut the length of it in half so you have two pieces of sweet potato each with one pointy end and one end that is the shape of a circle. Take the end that was cut and place that end into the food processor or mandoline. Sometimes I find that it is too wide to fit into the processor, if that is the case, you can cut the width in half and you will have half circles for chips (trust me, they taste just as good!).
Now slice all of the sweet potatoes up and you should have a whole bunch of slices. If you have the option of more than one slice width, the thinner the better. We only have one slicer for our food processor, so we stick with that and it works just fine. But if I had my wish, our slices would be slightly thinner.
Now time to prep your pan. If you are using more than two potatoes, you may need more than one pan. Take your largest jellyroll or baking pan and line with aluminum foil with the non-stick side up (if you have it - if not then don't worry about it). Next, take your non-stick spray and completely coat the surface of the pan or foil.
Now you are going to place the slices in rows on the pan. They can be touching but do not layer them on top of each other.
Get that non-stick spray again and completely coat the top of the slices. You're almost ready to put them in the oven! One last thing, get your salt grinder and put as much or as little on them as you want. I like salt but the Hubby doesn't like it as much so I do one side with a little more and the other side with a little less. We haven't ever switched them up, but I bet you could "flavor" them with whatever you wanted. Some chili powder, cumin, and cinnamon might be good.
They are ready to bake! This part is mostly subjective. We like them really baked where some of them are a little crunchy and browned, but they are good sorta mushy too. I know that sounds gross but you have to trust me, they are so good! The Hubby didn't trust me the first time and then he ate one and he was hooked! Put them in the preheated oven and leave them for about 15 minutes. Start checking on them at about the 10 minute mark. Once they seem to be pretty shriveled/shrunk and the thin ones are starting to brown on the edges, take them out and turn them over. I have gotten to where I use my hands now but when I first made them I used tongs. They are delicate so be careful not to "squeeze" them too much... you don't want to squeeze the puddin out of them! hehe. This may take a couple of minutes but once you turn them they are going to be ready pretty quickly. Put them back in the oven after you have flipped them, and leave them in for about 5-10 more minutes. Keep your eye on them because this part can go quickly. Remove when they are at your desired crispy-ness. As Hubby says, the longer the better... but you don't want to burn them!
So delicious and healthy! What a great combo! Be sure to eat these pretty quickly after you remove them from the oven because they cool really quickly. P.S. These are so good that a friend of ours who "would never eat a sweet potato", cleaned his plate. When he asked us what they were, he couldn't believe it! Come to think of it, these are probably a great way to get picky kids to eat something with some vitamins and nutrients.
Sweet Potato Chips
Non-stick spray
Aluminum foil
1 medium sweet potato per person
Sea salt in a grinder
And a food processor or mandoline slicer for slicing
Preheat oven to 425 degrees. Peel the sweet potatoes. Cut them in half length-wise (and then width-wise if needed to fit into processor). Slice all the sweet potatoes into thin slices. Line a large baking sheet or jellyroll pan with aluminum foil (if you have it) and then coat the pan with non-stick spray. Now line the sweet potato slices in rows, touching but not on top of one another. Then spray the slices to coat with non-stick spray. Top with seasoning of your choice... I use sea salt from a grinder. Bake for about 15 minutes then remove pan to turn slices. Replace in oven for another 5-10 minutes or until browned on edges. Eat em up!
Enjoy!
*****
I'm not really sure when or where I stumbled across this "recipe". I use the term recipe loosely because these are easy to tweak and there is not a whole lot to them. I think they may have been a weight watchers recipe. I know it's not a "baked item", but these are definitely something you should add to your rotation!
All you need is a large baking pan, aluminum foil (optional), one medium sweet potato per person, non-stick spray, a sea salt grinder, and a food processor or mandoline slicer.
Preheat your oven to 400 or 425 degrees (for us it depends on what we are cooking with it, but if there is nothing in the oven do 425). First you are going to peel the skin off the sweet potatoes. Now that you have the whole sweet potato with no skin, cut the length of it in half so you have two pieces of sweet potato each with one pointy end and one end that is the shape of a circle. Take the end that was cut and place that end into the food processor or mandoline. Sometimes I find that it is too wide to fit into the processor, if that is the case, you can cut the width in half and you will have half circles for chips (trust me, they taste just as good!).
Now slice all of the sweet potatoes up and you should have a whole bunch of slices. If you have the option of more than one slice width, the thinner the better. We only have one slicer for our food processor, so we stick with that and it works just fine. But if I had my wish, our slices would be slightly thinner.
Now time to prep your pan. If you are using more than two potatoes, you may need more than one pan. Take your largest jellyroll or baking pan and line with aluminum foil with the non-stick side up (if you have it - if not then don't worry about it). Next, take your non-stick spray and completely coat the surface of the pan or foil.
Now you are going to place the slices in rows on the pan. They can be touching but do not layer them on top of each other.
Get that non-stick spray again and completely coat the top of the slices. You're almost ready to put them in the oven! One last thing, get your salt grinder and put as much or as little on them as you want. I like salt but the Hubby doesn't like it as much so I do one side with a little more and the other side with a little less. We haven't ever switched them up, but I bet you could "flavor" them with whatever you wanted. Some chili powder, cumin, and cinnamon might be good.
They are ready to bake! This part is mostly subjective. We like them really baked where some of them are a little crunchy and browned, but they are good sorta mushy too. I know that sounds gross but you have to trust me, they are so good! The Hubby didn't trust me the first time and then he ate one and he was hooked! Put them in the preheated oven and leave them for about 15 minutes. Start checking on them at about the 10 minute mark. Once they seem to be pretty shriveled/shrunk and the thin ones are starting to brown on the edges, take them out and turn them over. I have gotten to where I use my hands now but when I first made them I used tongs. They are delicate so be careful not to "squeeze" them too much... you don't want to squeeze the puddin out of them! hehe. This may take a couple of minutes but once you turn them they are going to be ready pretty quickly. Put them back in the oven after you have flipped them, and leave them in for about 5-10 more minutes. Keep your eye on them because this part can go quickly. Remove when they are at your desired crispy-ness. As Hubby says, the longer the better... but you don't want to burn them!
So delicious and healthy! What a great combo! Be sure to eat these pretty quickly after you remove them from the oven because they cool really quickly. P.S. These are so good that a friend of ours who "would never eat a sweet potato", cleaned his plate. When he asked us what they were, he couldn't believe it! Come to think of it, these are probably a great way to get picky kids to eat something with some vitamins and nutrients.
Sweet Potato Chips
Non-stick spray
Aluminum foil
1 medium sweet potato per person
Sea salt in a grinder
And a food processor or mandoline slicer for slicing
Preheat oven to 425 degrees. Peel the sweet potatoes. Cut them in half length-wise (and then width-wise if needed to fit into processor). Slice all the sweet potatoes into thin slices. Line a large baking sheet or jellyroll pan with aluminum foil (if you have it) and then coat the pan with non-stick spray. Now line the sweet potato slices in rows, touching but not on top of one another. Then spray the slices to coat with non-stick spray. Top with seasoning of your choice... I use sea salt from a grinder. Bake for about 15 minutes then remove pan to turn slices. Replace in oven for another 5-10 minutes or until browned on edges. Eat em up!
Enjoy!
Friday, February 18, 2011
Not for the faint of "heart"
(my favorite flowers in the whole world - from the Hubs)
I thought long and hard about what to make for Adam for Valentine's Day. I definitely put more thought into it than I used to, now that I know a little more about baking. After searching online for a while, I finally came across this. I thought, gosh, I can do that! I really thought it couldn't be that hard.
So I bought all the ingredients for everything.
You will need 2-3 layers of red velvet cake (I'd make this from scratch), 4 layers of white cake (or if you mess up like me - 3 layers and a cake leveler, ha!), 1 cup or 1 can of cream cheese frosting (I used canned this time), a cake leveler, 2 cake boards, buttercream frosting (I'd really recommend making this from scratch, too), and lastly you will need some piping bags or some sort of gel/frosting to decorate with, oh and some room in your freezer... no joke.
Dang, that's a lot of stuff. Lucky for me I had a weekend mostly all to myself to work on this sucker (the hubby was at work). First you make the red velvet cake (recipe at bottom of post). Sure, you could make a box mix, but I really really wanted to try a homemade version since I had never done that before... it was worth it ;)
It's pretty straight forward. The only tip I would suggest would be to remember to put the butter out an hour or more before making this and the eggs out thirty minutes before making it. First, you will cream the butter and sugar until light and fluffy. Add the eggs, one at a time, beating well after each addition.
Next, in a small bowl stir together the red food coloring, cocoa, and vanilla. Then add it to the batter and mix well. In a measuring cup stir the salt into the buttermilk. *Tip: If you can't have lactose like me you can make your own buttermilk with lactose free milk! Horray! All you have to do is this: in a measuring cup, put one tablespoon of lemon juice. Then pour your choice of fat content lactose free milk over the lemon juice, up to the one cup line. Stir and then let it sit for two minutes. After it sits for the two minutes, you have you some sour-y, curdled, buttermilk!
Next, add the buttermilk/salt mixture to the batter in three parts, while alternating with the (sifted) cake flour. Each time you add one of these, mix well but don't over mix. Just enough to get them combined.
Next, put the baking soda and apple cider vinegar in a small bowl and stir. This totally reminded me of a science experiment, right?! Add it to the batter and mix well. (Remember to scrape the bowl with a spatula as needed.)
Divide the batter among three 8 or 9 inch well greased cake pans. The recipe I used also called for waxed paper in the bottom of the pans after greasing well. I didn't do that because for this cake I was making a cake/frosting mixture, but if you wanted to make a three layer red velvet cake you would definitely want to use the wax paper in addition to the greasing so that it doesn't stick. Bake for 30-40 minutes (it was closer to 40 for me). Test with a toothpick. The cakes are ready when the toothpick comes out clean. Also, different racks in the oven can make things cook at different times, so check them all. Once removing, let the layers cool in the pans for about an hour.
This makes quite a mess! And that's not the half of it.
While the red velvet cake is cooling, make the white cakes. You are going to want four of those store bought, aluminum/disposable, 8 inch cake pans. Now I'm going to be honest with you here, the red velvet cake, while sounding easy, took me a little longer than I thought. So while I had all the things to make homemade white cake, I ended up using two boxes of white cake mix. I know, I know. Bad Jenny. I'm sorry, I just couldn't do it! I had too much laundry to do! :) But if you want to make homemade white cake, here is the recipe "I am baker" used (she found it on food network). No matter what, make sure you grease and flour the pans really really well!
[White Cake
- 1 1/2 cups self-rising flour
- 1 1/4 cups all-purpose flour
- 1 cup (2 sticks) unsalted butter, softened
- 2 cups sugar
- 4 large eggs, at room temperature
- 1 cup milk
- 1 teaspoon vanilla extract
Preheat oven to 350 degrees F.
In a small bowl, combine the flours. Set aside.
In a large bowl, on the medium speed of an electric mixer, cream the butter until smooth. Add the sugar gradually and beat until fluffy, about 3 minutes. Add the eggs, 1 at a time, beating well after each addition. Add the dry ingredients in 3 parts, alternating with the milk and vanilla. With each addition, beat until the ingredients are incorporated but do not over beat. Using a rubber spatula, scrape down the batter in the bowl to make sure the ingredients are well blended. Carefully spoon the batter into a well greased and floured cake pan (or use Bakers Joy). Bake for 20 to 25 minutes (for round cake), or until a cake tester inserted into the center of the cake comes out clean.]
After making the white cake we will go back to the completely cooled red velvet and crumble it up!
I just put two of the three red velvets in a very large mixing bowl and broke them up very well with my hands. Then I put the last one in there and continued to break it up. Once you have small little red velvet bits, take the 1 cup or 1 can of cream cheese frosting and put it all on top of the crumbled cake.
Now before you put your hands in this crazy mess, make sure you take off all your rings and bracelets and hair ties (come on you know you wear them around on your wrist) and watches. Now that you took the appropriate precautions, get dirty! You are going to need to mix this well. And while Bakerella says to use a spoon or spatula, I've found that the best way to do it is use your hands. Channel your inner 5 year old and pretend you're playing in dirt. It's fun! Once that is combined, stick in the fridge.
Next, make the buttercream. See recipe below. It's pretty straight forward.
Then take your completely cooled white cakes and level them with your cake leveler. You just want flat tops. Nothing crazy.
Then, put one on each cake board. Now this is where I had a slight (read: major) problem. Is it possible to wait too long to take the cake out of the pan? I let it cool for a good while so I could do other things, and the one cake in my regular pan (not the disposable ones from the grocery store - they were sold in packs of 3 so I only bought one pack) broke in half!!!! :( Major sad face.
So I guess the only suggestion that I have, because I am very obviously not a professional cake maker (and you will also see not a professional cake decorator later), is to let the cakes cool for about 10 minutes or until you can handle the pan safely with your bare hands, and then cool them the rest of the time on cooling racks. The weird thing is I had basically no problem with the disposable pans. I ran a knife around the edges, like you always should, and they came right out. Oh well. Since I had one cake disaster, I decided to cut the third tier, the one not on a cake board yet, in half. I used my cake leveler and cut it right in half to make a 3 layer cake by using two cakes of 1 1/2 layers.
So if you caught that, next you will make 2 - two layer cakes (for me it was 1 1/2, wha whaa). Take the two cakes on the cake boards and frost the tops of both of them with about 1/2-3/4 cup of buttercream frosting. Then take your other two layers and place one on top of each of the frosted cakes. Now that you have your 2 - two layer cakes on cake boards, stick em in the freezer! For real, you can't skip this step. It's crucial to the carving of the heart. Basically you can't even do this if you can't freeze them. I put them in there overnight, but I think around 3 hours should do the trick.
Once you've chilled the red velvet mixture and frozen the white two layer cakes, you are ready for the hard part.
Take the white cakes out of the freezer and set them on the counter. Now if you are spatially "slow" like me, take two toothpicks and stick them in the cake like this:
That's twine between them to hold them together. Use a double knot to hold them on there good and tight. Now take the one on the outside of the cake and draw it into the cake all the way around the circumference of the cake (Whoa, yup I just threw out a math term... my dad - a retired math teacher - would be so proud). Make sure you can see the line well. It took me two go rounds to get it to show well. Do this on both of the white cakes. I just took the toothpicks from the first cake already tied together and transferred them carefully to the second cake.
Now is the hardest part of all. The carving. Carve out a cone shape in the first cake. This is the bottom, and that's very important to remember. I used a knife to help me get the basic shape and then dug it out and made sure it was a smooth line with a spoon.
I just put two of the three red velvets in a very large mixing bowl and broke them up very well with my hands. Then I put the last one in there and continued to break it up. Once you have small little red velvet bits, take the 1 cup or 1 can of cream cheese frosting and put it all on top of the crumbled cake.
Now before you put your hands in this crazy mess, make sure you take off all your rings and bracelets and hair ties (come on you know you wear them around on your wrist) and watches. Now that you took the appropriate precautions, get dirty! You are going to need to mix this well. And while Bakerella says to use a spoon or spatula, I've found that the best way to do it is use your hands. Channel your inner 5 year old and pretend you're playing in dirt. It's fun! Once that is combined, stick in the fridge.
Next, make the buttercream. See recipe below. It's pretty straight forward.
Then take your completely cooled white cakes and level them with your cake leveler. You just want flat tops. Nothing crazy.
Then, put one on each cake board. Now this is where I had a slight (read: major) problem. Is it possible to wait too long to take the cake out of the pan? I let it cool for a good while so I could do other things, and the one cake in my regular pan (not the disposable ones from the grocery store - they were sold in packs of 3 so I only bought one pack) broke in half!!!! :( Major sad face.
So I guess the only suggestion that I have, because I am very obviously not a professional cake maker (and you will also see not a professional cake decorator later), is to let the cakes cool for about 10 minutes or until you can handle the pan safely with your bare hands, and then cool them the rest of the time on cooling racks. The weird thing is I had basically no problem with the disposable pans. I ran a knife around the edges, like you always should, and they came right out. Oh well. Since I had one cake disaster, I decided to cut the third tier, the one not on a cake board yet, in half. I used my cake leveler and cut it right in half to make a 3 layer cake by using two cakes of 1 1/2 layers.
So if you caught that, next you will make 2 - two layer cakes (for me it was 1 1/2, wha whaa). Take the two cakes on the cake boards and frost the tops of both of them with about 1/2-3/4 cup of buttercream frosting. Then take your other two layers and place one on top of each of the frosted cakes. Now that you have your 2 - two layer cakes on cake boards, stick em in the freezer! For real, you can't skip this step. It's crucial to the carving of the heart. Basically you can't even do this if you can't freeze them. I put them in there overnight, but I think around 3 hours should do the trick.
Once you've chilled the red velvet mixture and frozen the white two layer cakes, you are ready for the hard part.
Take the white cakes out of the freezer and set them on the counter. Now if you are spatially "slow" like me, take two toothpicks and stick them in the cake like this:
That's twine between them to hold them together. Use a double knot to hold them on there good and tight. Now take the one on the outside of the cake and draw it into the cake all the way around the circumference of the cake (Whoa, yup I just threw out a math term... my dad - a retired math teacher - would be so proud). Make sure you can see the line well. It took me two go rounds to get it to show well. Do this on both of the white cakes. I just took the toothpicks from the first cake already tied together and transferred them carefully to the second cake.
Now is the hardest part of all. The carving. Carve out a cone shape in the first cake. This is the bottom, and that's very important to remember. I used a knife to help me get the basic shape and then dug it out and made sure it was a smooth line with a spoon.
The bottom is similar but definitely a little bit harder. It's a cone but the bottom of the cone (the skinny part) has another upside down cone island in it. See:
I don't know how else to describe it. And carving it is just a guessing game. I cut slowly to see if I had enough room for the "island". I don't know that I am baker had any better directions. It's just hard to explain. By the way, this is the top. Remember that. You definitely want to keep track of which one is which. Personally I wrote on the top cake board "top", because you will discard that cake board eventually.
Once you have the top and bottom carved and cleaned out. Take the red velvet mixture and fill up the carved out cavities. Ew... that sounds like something from the Hubby's anatomy class. Anywho, fill em up. I used the mixture to create a fairly sturdy edge of it around the edges of the cavities - don't push too hard but you can use a little force since the white cake is frozen.
Then I filled the rest of it in a little less haphazardly. Make sure the top of the red velvet filling is both flat and flush with the top of the white cake.
Once you have the top and bottom carved and cleaned out. Take the red velvet mixture and fill up the carved out cavities. Ew... that sounds like something from the Hubby's anatomy class. Anywho, fill em up. I used the mixture to create a fairly sturdy edge of it around the edges of the cavities - don't push too hard but you can use a little force since the white cake is frozen.
Then I filled the rest of it in a little less haphazardly. Make sure the top of the red velvet filling is both flat and flush with the top of the white cake.
Next, put frosting on the white part/edge of the bottom cake. This is to hold the top cake in place. (See I am baker's post for this. I was rushing and forgot to take pictures of the next couple steps.)
Now that you have frosted the bottom edge, take the top cake and flip it over onto your hand, CAREFULLY. Then use both hands to hold it (with the red velvet filling facing down) and slowly center it over the bottom cake. Once you're sure it's as centered as it can be, place it carefully on the cake. Hard part's done!!! Yay!
Now remove the cake board on top carefully and then take your buttercream frosting again, and do a thin-ish crumb coat over the entire cake. Now you want to refrigerate it for about an hour or so to set the frosting.
After the frosting is set, take it out and do the final frosting layer. I was in a hurry at this point, which is unfortunate because I could have definitely been more careful and done a better job. The frosting job I did was too thick and I also didn't refrigerate it at all after the last coat to set it. Stupid Jenny. That led to a major "frosting meltdown" the next day... after we had our first slices. One whole side of the cakes frosting just fell off! haha. We thought it was funny but it would have totally sucked if you did this for a party or something. So take your time and be sure to set it well! Then decorate as you please.
Now that you have done ALL THAT WORK! And it is a lot. Cut into that sucker!
We cut a huge first slice so we could see the heart.
This was my first time making this, and I have to give myself credit... it wasn't a complete disaster like I thought it would be. Granted, the outside of the cake was pretty hideous, but the red velvet really did resemble a heart. Not as good as I am baker's but pretty decent! Horray! Hubby was super impressed and LOVED the cake. Like, asked me to make it again one day, loved it. We will see if that ever happens, the whole making it again thing. That was a pretty insane process. But it was worth it. And I think I really made the Hubs feel special... which was the whole point.
So if you're crazy, try this. If not, just observe and laugh at how crazy I am. Either way, I hope you enjoyed this. See below for the rest of the recipes. I'll be back next week with another belated Valentine's day post. And a much much easier one at that!
Have a great weekend!!! It's supposed to be a beautiful one in the Southeast, so I hope you southerners can enjoy it!
Red Velvet Cake
(adapted from Magnolia Bakery and I am baker)
Now that you have frosted the bottom edge, take the top cake and flip it over onto your hand, CAREFULLY. Then use both hands to hold it (with the red velvet filling facing down) and slowly center it over the bottom cake. Once you're sure it's as centered as it can be, place it carefully on the cake. Hard part's done!!! Yay!
Now remove the cake board on top carefully and then take your buttercream frosting again, and do a thin-ish crumb coat over the entire cake. Now you want to refrigerate it for about an hour or so to set the frosting.
After the frosting is set, take it out and do the final frosting layer. I was in a hurry at this point, which is unfortunate because I could have definitely been more careful and done a better job. The frosting job I did was too thick and I also didn't refrigerate it at all after the last coat to set it. Stupid Jenny. That led to a major "frosting meltdown" the next day... after we had our first slices. One whole side of the cakes frosting just fell off! haha. We thought it was funny but it would have totally sucked if you did this for a party or something. So take your time and be sure to set it well! Then decorate as you please.
Now that you have done ALL THAT WORK! And it is a lot. Cut into that sucker!
We cut a huge first slice so we could see the heart.
This was my first time making this, and I have to give myself credit... it wasn't a complete disaster like I thought it would be. Granted, the outside of the cake was pretty hideous, but the red velvet really did resemble a heart. Not as good as I am baker's but pretty decent! Horray! Hubby was super impressed and LOVED the cake. Like, asked me to make it again one day, loved it. We will see if that ever happens, the whole making it again thing. That was a pretty insane process. But it was worth it. And I think I really made the Hubs feel special... which was the whole point.
So if you're crazy, try this. If not, just observe and laugh at how crazy I am. Either way, I hope you enjoyed this. See below for the rest of the recipes. I'll be back next week with another belated Valentine's day post. And a much much easier one at that!
Have a great weekend!!! It's supposed to be a beautiful one in the Southeast, so I hope you southerners can enjoy it!
Red Velvet Cake
(adapted from Magnolia Bakery and I am baker)
- 3 1/3 cups cake flour (not self-rising)
- 1 cup (2 sticks) unsalted butter, softened
- 2 1/4 cups sugar
- 2 large eggs and 2 large egg yolks, at room temperature
- 2 tablespoons red food coloring
- 3 tablespoons unsweetened cocoa
- 1 1/2 teaspoons vanilla extract
- 1 1/2 teaspoons salt
- 1 1/2 cups buttermilk
- 1 1/2 teaspoons cider vinegar or apple cider vinegar
- 1 1/2 teaspoons baking soda
Preheat oven to 350 degrees.
Grease and lightly flour three 9 x 2-inch round cake pans, then line the bottoms with waxed paper.
To make the cake:
In a small bowl, sift the cake flour and set aside. In a large bowl, on the medium speed of an electric mixer, cream the butter and sugar until very light and fluffy, about 5 minutes. Add the eggs, one at a time, beating well after each addition. In a small bowl, whisk together the red food coloring, cocoa, and vanilla. Add to the batter and beat well. In a measuring cup, stir the salt into the buttermilk. Add to the batter in three parts, alternating with the flour. With each addition, beat until the ingredients are incorporated, but do not overheat.
In a small bowl, stir together the cider vinegar and baking soda. Add to the batter and mix well. Using a rubber spatula, scrape down the batter in the bowl, making sure the ingredients are well blended and the batter is smooth. Divide the batter among the prepared pans. Bake for 30-40 minutes, or until a cake tester inserted in the center of the cake comes out clean. Let the layers cool in the pans for 1 hour. Remove from the pans and cool completely on a wire rack.
Vanilla Buttercream Frosting
(from Magnolia Bakery and adapted from I am baker)
Makes enough for one 2-layer 9-inch cake or 2 dozen cupcakes, thus I doubled it for the whole heart cake project.
(from Magnolia Bakery and adapted from I am baker)
Makes enough for one 2-layer 9-inch cake or 2 dozen cupcakes, thus I doubled it for the whole heart cake project.
- 1 cup (2 sticks) unsalted butter, softened
- 6 to 8 cups confectioners’ sugar (I used 6 and it we definitely not enough. Next time I'll use the full 8 cups. For some reason I have a hard time with consistency. I always think it's thick enough when it's still too thin. You'll see this problem also arise in my second V-day post next week. I guess I've finally learned my lesson!)
- 1/2 cup milk
- 2 teaspoons clear vanilla extract (so you have white frosting)
- 1 teaspoon almond extract
Place the butter in a large mixing bowl. Add 4 cups of the sugar and then the milk and vanilla. On the medium speed of an electric mixer, beat until smooth and creamy, about 3-5 minutes. Gradually add the remaining sugar, 1 cup at a time, beating well after each addition (about 2 minutes), until the icing is thick enough to be of good spreading consistency. If desired, add a few drops of food coloring and mix thoroughly. (Use and store the icing at room temperature because icing will set if chilled.) Icing can be stored in an airtight container for up to 3 days.
Subscribe to:
Posts (Atom)