Showing posts with label Breakfast. Show all posts
Monday, April 4, 2011
Things I really want to make...
Since we are on vacation this week (with our toes in the water and bums in the sand) I figured I would tease you with some of the things I am wanting/hoping to make sometime soon. And, no, that picture is not from the trip we are on right now... I wish! It's from our honeymoon last June. Man I miss Playa Mujeres, Mexico!
Back to the sweets... the way I decide what I'm planning to make is basically a free for all. If I see something on a blog and it tugs at me enough I usually end up making it. So what ends up happening is I have about 25 unread blog posts in my reader for weeks on end until I either 1) print all of the recipes out and marinate on them until one jumps out oat me; or 2)decide on one, print it out, and make it!
So here are some that are sitting stagnant in my reader right now. They all look so darn good! Maybe I'll make one while we're on vacation for us to enjoy :) We'll see.
Because I have not had the real thing (but am determined to visit the beautiful city home to these delicious confections one day): http://eatliverun.com/oven-baked-beignets/
Because every southern girl needs to know how to make a good pecan pie (and I like things with a twist): http://17andbaking.com/2011/03/15/coconut-pecan-why-not-pie-with-walnuts-and-toffee/
Because I haven't had one of these since high school and it's time to revisit: http://www.acozykitchen.com/salted-caramel-rice-krispie-treats/
Because they sound good and I would probably feel very sophisticated eating these with some french press coffee (@Sarah) and reading a newspaper: http://cupcakesandcashmere.com/cranberry-orange-scones/?utm_source=feedburner&utm_medium=feed&utm_campaign=Feed%3A+CupcakesAndCashmere+%28Cupcakes+and+Cashmere%29
Because, well, you already know my love for peanut butter and chocolate: http://www.howsweeteats.com/2011/03/peanut-butter-stuffed-hot-fudge-cupcakes/?utm_source=feedburner&utm_medium=feed&utm_campaign=Feed%3A+howsweeteats%2FsmSp+%28How+Sweet+It+Is%29
Because the Hubby loves red velvet: http://www.howsweeteats.com/2011/03/red-velvet-brownies-with-white-chocolate-frosting/?utm_source=feedburner&utm_medium=feed&utm_campaign=Feed:howsweeteats/smSpHowSweetItIs
Because I looooove anything with the word snickerdoodle in it and these remind me of my Chocolate Crack Cookies (even though they are far from cookies): http://thepioneerwoman.com/tasty-kitchen-blog/2011/03/step-by-step-snickerdoodle-muffins/
Because... see above, oh and I die for anything lemon flavored: http://www.culinaryconcoctionsbypeabody.com/2011/02/25/lemon-snickerdoodles/
Because omg I don't think my taste buds can handle this... and one of the Hubby's favorite cereals is Captain Crunch: http://www.culinaryconcoctionsbypeabody.com/2011/03/11/peanut-butter-captain-crunch-marshmallow-brownie-bars/
Because one of the Hubby's favorite cookies I make is oatmeal scotchies... so maybe we should try these: http://www.culinaryconcoctionsbypeabody.com/2011/03/14/oatmeal-scotchie-bars/
So there you have it. That's what I'm craving to make right now. I think one of these might work really well for baking on our trip. Maybe you'll get to see it next week... y'all come back now, ya hear!
Monday, March 28, 2011
Blueberry Banana Whole Wheat Pancakes (that are actually really yummy!) plus a photography offer!
Finally a baking/cooking post for those of you with a sweet tooth! But before we get to the tasty breakfast, I wanted to let all of you know about something I'm working on right now. As you can tell, I've been posting a lot of photography lately. If any of you who read this live in the Atlanta area and want free portraits (maternity, baby, family, engagement) in the next 3 months, let me know. I am trying to build a portfolio, so the next three people who contact me and mention this blog will get a free portrait session plus all the edited photos on a share site with shutterfly.com and on a disc for free. I'm definitely still learning and still have a lot to learn about photography, so I hope you will let me practice on you!
A few weeks ago the Hubby actually had a weekend day off. So I decided I was going to make us a tasty, yet somewhat (kinda sort, ha!) healthy, breakfast. I went back and forth between several options but ended up deciding on Blueberry Banana Pancakes I found on Tasty Kitchen. After looking at the recipe, I knew I could make these with half whole wheat flour half regular all-purpose flour (actually I probably could have even done more wholewheat and the remainder all-purpose).
First you are going to combine the milk (I used 2%) and lemon in a small bowl and set aside. Next, mash the banana and mix with the eggs, vanilla, brown sugar, honey, and melted butter. I didn't actually mash the banana because they were pretty ripe and I knew that my stand mixer would take care of that, but either way would work.
Next you will sift together all the dry ingredients and set aside for a moment.
Then combine the banana mixture and the milk mixture (which is now technically buttermilk... it's that easy to make it, remember).
Lastly, add dry ingredients and mix until just incorporated.
Let this mixture sit covered for about 5-10 minutes. Heat a skillet coated with butter on medium high heat.
We had tried one pancake but the pan wasn't hot enough (that's why it looks dirty), so we tried again before making the next pancake... so make sure you have it hot enough before you start.
While you're waiting for the pan to heat, wash and dry the blueberries, then coat them with the remaining sugar and flour. Then add them to the batter and fold together. Don't mix too much.
Now you should be ready to make you some tasty pancakes. Put about 1/4 cup (ha, we just eyeball it... we like larger pancakes) into the pan.
Flip when bubbles start forming around the edges (or when the bottom is a nice darkish golden brown).
Cook on the other side until golden brown. Remove from the pan and add more butter to re-coat it between batches. This really made enough for four people, and I'm kicking myself now that I didn't freeze the other half of the batter instead of throw it away. Dumb Jenny. Oh well. We served with bacon, light syrup, and coffee. Delish!
Blueberry Banana Whole Wheat Pancakes
Makes 4 servings.
- 2 cups milk
- 1 tbsp lemon juice
- 2 bananas
- 2 eggs
- 1 tsp vanilla extract
- 2 tbsp brown sugar
- 1 tbsp honey
- 4 tbsp melted butter (plus extra for cooking)
- 1 cup whole wheat flour
- 1 cup all-purpose flour
- 2 tsp baking powder
- 1 tsp baking soda
- ½ tsp salt
- 1 cup blueberries
- 2 tbsp flour
- 1 tbsp sugar
Combine milk and lemon in a small bowl and set aside. Mash bananas and mix with eggs, vanilla, brown sugar, honey, and melted butter. Sift together the dry ingredients and set aside for a minute. Combine banana mixture and milk mixture, then add in the dry ingredients. Mix until just combined. Let sit covered for about 5-10 minutes.
Heat a skillet coated with butter on medium high heat.
Wash and dry blueberries, then coat with the remaining sugar and flour. Add them to the batter and fold together, being careful not to mix too much.
Place 1/4 cup of batter into the pan (or more for larger pancakes). Flip when bubbles start around the edges or the bottom is a nice golden brown. Cook on the other side until golden brown. Remove from the pan, re-coat the pan with butter in between batches, and continue making pancakes with the rest of the batter.
Print this recipe!
Enjoy friends!!! And have a great week!!
P.S. I have one really promising thing coming up in a few weeks for a potential job in Charleston. Keep your fingers crossed for me!
Tuesday, March 15, 2011
Drum roll please........ Cinnamony Sugar Pull-Apart Breakfast Bread
After seeing not one, but two different blog posts on this particular treat, I just had to make it. And who better to "test it out" on than my in-laws, since they always love our breakfast treats. Trying to describe it without you actually tasting it is difficult, but the best I can explain is a mix between monkey bread and french toast. Yes, it's that good. Seriously.
The really great thing about this recipe is that you don't really need any special tools. Even before I was a "baker" I would have had everything I needed to make this.
First off, you are going to whisk together the whole wheat flour, 3/4 cups of the all-purpose flour, sugar, yeast, and salt in a large mixing bowl and set aside. Then, whisk together the eggs in a small bowl and set aside.
In a small saucepan you are going to melt together the milk and butter until the butter has just completely melted. Be sure to stir while heating so you don't burn the milk. Remove from the heat and add water and vanilla extract and stir. Let the mixture stand for two minutes or until it is between 115-125 degrees F.
Pour the milk mixture into the flour mixture and stir with a spatula. After combined, pour in the eggs and stir until the eggs are incorporated into the batter. Just keep on stirring until it is all well combined. After it's well mixed, add the remaining 3/4 cup of all-purpose flour and stir with the spatula until it's well combined (about 2 minutes). It's very very sticky.
Grease a large bowl well (I usually just spray it down really good with non-stick spray) and then place the dough in it to rise. Cover the bowl with plastic wrap and a clean kitchen towel. Place in a warm space and allow to rest/rise until doubled in size - 1 hour. I put my rising dough in the oven at about 100 degrees (I just turn it on at 350 to warm up for about a minute and a half and then shut it off.... and Lord have mercy please don't forget to shut the oven off or you will have a major nightmare of messed up dough and possibly a melted bowl on your hands). *Joy The Baker says that if you are making this in advance you can refrigerate the dough after this step. I actually disagree with her. I say you go all the way until the dough is ready to bake and then you refrigerate it. The reason is that there is really no reason why you can't do that, and the baking process takes a little while (i.e. bring dough back to room temp. or close to room temp, bake for about 35 minutes, then let cool for about 15 minutes).
While the dough is rising you can mix together the sugar, cinnamon, nutmeg, brown sugar mixture. Set that aside. Then, melt 4 tablespoons of butter until browned (mess alert: don't do this in the microwave for too long or it could explode... I kinda forgot it could do that, ha!). Set the butter aside. Then grease and flour a regular sized loaf pan (or Baker's Joy it) and set that aside too.
After the dough has finished rising, deflate it and knead 2 tbsp of flour into it. Cover with a clean kitchen towl and let it rest for 5 minutes. On a lightly floured, large work surface, use a rolling pin to roll out the dough. Joy says it should be about 20in. x 12 in. I just say get it as big as you can.
Next, use a pastry brush to spread the melted butter across all of the dough. Then sprinkle with all of the sugar/cinnamon mixture. Yummy. So I got a little dough cutting happy and cut it before I brushed the butter and sprinkled the mixture... and I'm here to report that it works out fine either way :) But it's definitely easier to do the brushing and sprinkling before you cut it. Slice the dough vertically into six strips of the same size. Then, stack the strips all together and slice that stack into six squares(ish). You should have 36 square ish sized pieces of dough, give or take a few.
Now, take the individual stacks of six and place them into the loaf pan one stack at a time. Now, take a kitchen towl and place it over the loaf pan and allow it to rise in a warm place for 45 minutes until it has almost doubled in size. *After this step, I refrigerated the dough to be ready to bake the next morning. But you could also continue from here and bake immediately after it is finished rising. Just be sure to set out for an hour or hour and a half before you are ready to bake it if you decide to refrigerate it.
I went up to that last step the day before. Then the in-laws came over and the Hubby cooked dinner for us. Roasted leg of lamb with stuffed tomatoes, roasted asparagus, and homemade rosemary bread. To.die.for. Well most of it. Everyone loved the lamb but me. For some reason it was really gamey to me. Weird. Anyways, I loooooved the rest of it. Especially the stuffed tomatoes. I may just have to do a post on them one day. They were ridiculous. Here is a picture of our fest:
Picking back up the next morning, I brought the dough back to room temp. Now time to bake it! Place the rack in the center of the oven and preheat to 350 degrees F. Then, place the loaf pan filled with the yummy looking flip-book of dough in the oven and bake for 30-35 minutes, until the top edges are very golden brown.
As Joy says, if the top is only lightly browned, the center is still not baked all the way... be patient people!
Remove from the oven and allow to sit out for about 15 minutes. At this point you can make the optional icing. I made it and used it but it definitely wasn't necessary... it just added a little something extra. Mix together the powdered sugar, milk, and orange juice and set aside. You can also add 3 oz. of cream cheese at room temp. if you want it to be a much thicker frosting.
Then, after running a butter knife around the edges, turn the bread onto a plate. Then, if you care, you can invert that onto a serving platter or cake plate for it to be right side up. We were a little impatient and didn't care... we just dug right in!
I piled about 5 pieces up on a plate with the eggs and bacon we ate. After piling up the pieces, I just took a spoonful of the icing and drizzled it on top.
Man... seriously, delicious. Like OMG delicious. Like everyone cleaned their plates delicious. Like, there was a little leftover, I went to take a nap, came back out of the bedroom and the leftovers vanished delicious (yup, I was super sad... but my skinny jeans were oh so happy, they've been workin' hard lately).
I served it with eggs and bacon. Dude... so good.
I hope you enjoyed this! I would definitely give it a try for any sort of special breakfast/brunch occasion. So worth the time you wait for this sucker to rise!
Print this recipe!
Have a great week!
Friday, March 11, 2011
Torn - which breakfast treat to make?
Help! I am trying to find something that's not too crazy to make for breakfast Sunday morning for some overnight guests (a.k.a. my in-laws).
I NEED your input people! Puhhlease, pretty please? I'm not really wanting to be the tie breaker between the (maybe) two people who will comment, so you lurkers, can you comment too please? I know there are at least 3 or 4 of you ;-) hehe.
Ok, so we can go with the tried and true: http://bakography.blogspot.com/2011/01/cant-stop-eating-monkey-bread-and.html
The subtle and not overboard but still looks delish: http://www.joythebaker.com/blog/2011/03/cinnamon-sugar-pull-apart-bread/
The way overboard and totally out there: http://www.howsweeteats.com/2011/03/cake-batter-cinnamon-rolls/?utm_source=feedburner&utm_medium=feed&utm_campaign=Feed:howsweeteats/smSpHowSweetItIs
Or the french bakery with coffee and a newspaper option: http://cupcakesandcashmere.com/cranberry-orange-scones/?utm_source=feedburner&utm_medium=feed&utm_campaign=Feed%3A+CupcakesAndCashmere+%28Cupcakes+and+Cashmere%29
Ugh... I just don't know! Help!
P.S. I am certainly thinking about those in Japan and elsewhere effected by the earthquake and tsunami. God speed to all of you. As a friend said on facebook, "Mother nature is powerful. Sending love to Japan". My thoughts exactly.
I NEED your input people! Puhhlease, pretty please? I'm not really wanting to be the tie breaker between the (maybe) two people who will comment, so you lurkers, can you comment too please? I know there are at least 3 or 4 of you ;-) hehe.
Ok, so we can go with the tried and true: http://bakography.blogspot.com/2011/01/cant-stop-eating-monkey-bread-and.html
The subtle and not overboard but still looks delish: http://www.joythebaker.com/blog/2011/03/cinnamon-sugar-pull-apart-bread/
The way overboard and totally out there: http://www.howsweeteats.com/2011/03/cake-batter-cinnamon-rolls/?utm_source=feedburner&utm_medium=feed&utm_campaign=Feed:howsweeteats/smSpHowSweetItIs
Or the french bakery with coffee and a newspaper option: http://cupcakesandcashmere.com/cranberry-orange-scones/?utm_source=feedburner&utm_medium=feed&utm_campaign=Feed%3A+CupcakesAndCashmere+%28Cupcakes+and+Cashmere%29
Ugh... I just don't know! Help!
P.S. I am certainly thinking about those in Japan and elsewhere effected by the earthquake and tsunami. God speed to all of you. As a friend said on facebook, "Mother nature is powerful. Sending love to Japan". My thoughts exactly.
Sunday, January 16, 2011
Can’t. Stop. Eating. … Monkey Bread (and an interesting fact about me)
I already told you about our Snowpocalypse 2011 here in Georgia. Well after the third day of being trapped inside our apartment mostly alone because the Hubs had to work, I decided I needed to bake something. I had always wanted to try to make some monkey bread. Hubby’s mom had made it before and it looked, smelled, and tasted delicious. However, I wanted to take it one step further and make the dough also. Most people use refrigerated biscuit dough, which is great in a time crunch, but I had all the time until the ice melted in the world.

Yeah, I know, it looks freakishly good, right? Well believe me when I say it definitely was.
I found this recipe while surfing the web. It is from thenest.com.
Like the marshmallows this recipe requires a good bit of waiting. And while I told you I’m usually a very impatient baker, I was getting so bored being cooped up that I was willing to wait for this masterpiece.
First I made the dough. Normally I would show you pictures of the dough making, but there really weren’t any pictures to take… yeast in water actually looks kind of gross. Plus, you are constantly adding flour into the mixture to make sure the dough forms correctly.

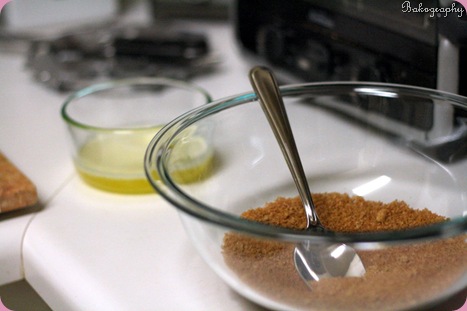
After preparing the dough you will wait for it to rise for 1 hour. While the dough is rising, prepare the coating. Place the butter in one small bowl and light brown sugar and cinnamon in another, medium bowl. The recipe called for 1/2 cup brown sugar and 2 tsp of cinnamon. I found that this was not enough to coat all the balls of dough. So I would do 1 1/2 times this amount, or 3/4 cup brown sugar and 1 tbsp of cinnamon. Once the rising is finished, you break the dough into balls and coat it, which in my opinion, is the fun part (other than eating it, of course)!
The recipe said to take the dough and cut it into 1/2 inch pieces. I don’t know about you, but I couldn’t figure where to even start with cutting a huge round piece of dough into 1/2 inch pieces. Very confusing. So, with Hubby’s input (he had finally returned home from work!), we decided to just pull off pieces and eyeball it. We did balls the size of a golf ball. Next time I would actually even do them a little bit smaller. I had totally forgotten that we had to let them rise again. Once they had risen the second time they were a little too big to eat in one or two bites… more like three. Which, I think, for a finger food is too big.
Not the best picture in the world (my f-stop was too low), but you get the idea of the size of the balls we made in Hubby’s hand.Once you have your balls, that’s what she said you will take them one at a time and coat them in the butter first and then the sugar mixture. As you finish each piece, you will place them in a well greased bundt or tube pan. You don’t have to pack them in too much, but make sure they are touching. You will probably have two to three layers of them.

Now you let them rise for one more hour. I know, I know, it’s painful having to wait that long to bake those tasty little brown sugary, cinnamony, doughy things! In case you are dying at this point, the sugar mixture tastes pretty good too ;-)
Preheat your oven to 350F. After the hour of rising, bake them for 30-35 minutes. While it’s baking, make the icing. All it is is sugar and milk. The recipe called for whole milk, but I used 2% and it was just fine. *Tip: When a recipe calls for whole milk, usually you can use any fat content except skim. It just needs some fat to make it work.
And you want to hear something even more crazy (about me)… I’m lactose intolerant. I also have other digestive problems that don’t allow me to eat fried foods and a few other random things. Yup, it totally sucks! And I’m not talking just a little bit, I have a very severe form of it. Like so severe I can’t have any: cheese other than a little parmesan or lactose free swiss (there is only one kind made by Boars Head), milk/cream/half and half other than a small amount of lactose free milk in baked items, any cream sauces at all. If I do eat any of those forbidden items I get very very sick. So sick that I can’t leave my house. And even when I eat the items that I can have a small amounts of I still have symptoms, just not so bad that I can’t function. I know, I know you’re probably wondering why I bake and how the hell I manage with this. I’ve just managed to work around it and have found that it’s really not that big of a deal as long as I’m careful. I also have a few different medications that can help if I do get sick. So, now you know, in all of my recipes that call for milk I use lactaid milk (except cornbread, in which case I use rice milk because it sweetens it up… so much so that the Hubby prefers that cornbread to any other kind). Power to the lactose intolerant! hahaha. I know I’m not the only one, so I hope this helps others who have dietary restrictions. You can almost always work around it!
Anywho… back to the monkey bread: Two minutes after removing from the oven, transfer to a cooling rack. Don’t be intimidated by this step. All you have to do is put the rack on top of the open side of the pan and, with pot holders, flip it over. That’s it! Easy peasy. After cooling for 15 minutes on the cooling rack, transfer to a serving plate. Then, take the icing you made with a spoon and drizzle that tasty stuff all over the monkey! I prefer to do this while it’s still warm because it drips prettier, but you could probably do it once it’s cool too.
Now EAT IT UP! I wanted some so bad that I took a bite before I even took a picture. Bad Jenny! It was SO. FREAKIN. GOOD!
Monkey Bread (adapted from thenest.com)
It said it serves 6-8. I think that totally depends on how much you want. It could definitely feed more.
Dough
1 envelope active dry yeast 1 egg
1/4 cup warm water 1 cup warm 2% milk
1/3 cup granulated sugar 1/4 cup unsalted butter, softened, divided
1 tsp salt 4 cups all-purpose flour, divided
Coating
6 tbsp unsalted butter, melted
3/4 cup light brown sugar
1 tbsp ground cinnamon
Icing
2 cups confectioner’s sugar
1/4 cup 2% milk
To make:
1. Prepare dough: In stand mixer bowl, stir together yeast, water, and a pinch of sugar. Let stand 5 minutes. Add sugar, salt, egg, milk, and 3 tbsp of butter. Attach the flat beater, and mix on the “stir” speed. Then mix in 2 cups of flour in 1/2 cup increments, until a dough forms.
2. Remove flat beater and attach dough hook. Set to speed 2 and mix in remaining flour, in 1/2 cup increments. Continue beating/kneading about 1 minute on speed 2. Using hands, form dough into a ball and then rub with remaining 1 tbsp of butter. Place back into the mixer bowl and cover with plastic wrap. Let rise for one hour.
3. While rising, prepare coating: Place butter in a small bowl and melt in microwave. In another medium sized bowl, stir together brown sugar and cinnamon. After coating is ready, prepare the pan. Grease a bundt or tube pan well. (I used smart balance butter from tub, but you can use any kind of butter.
4. When the dough is finished rising, remove from bowl and place on cutting board. Pinch off dough and roll into balls a little bit smaller than a golf ball. Just use your best judgment… you won’t mess it up. Coat balls in melted butter then roll in sugar mixture. Place in prepared pan as you go, with balls touching in layers (you will have 2-3 layers). Cover with plastic wrap and let rise for one hour.
5. While rising, prepare icing. In small bowl, stir together confectioner’s sugar and milk until smooth. Then, preheat the oven to 350F. Once ready, bake for 30-35 minutes. After two minutes of cooling in pan, transfer to cooling rack. Let cool on rack for 15 minutes then transfer to serving platter. Immediately take icing on a spoon (you may need to give it a little stir) and drizzle all over the monkey bread.
ENJOY!
Yeah, I know, it looks freakishly good, right? Well believe me when I say it definitely was.
I found this recipe while surfing the web. It is from thenest.com.
Like the marshmallows this recipe requires a good bit of waiting. And while I told you I’m usually a very impatient baker, I was getting so bored being cooped up that I was willing to wait for this masterpiece.
First I made the dough. Normally I would show you pictures of the dough making, but there really weren’t any pictures to take… yeast in water actually looks kind of gross. Plus, you are constantly adding flour into the mixture to make sure the dough forms correctly.
After preparing the dough you will wait for it to rise for 1 hour. While the dough is rising, prepare the coating. Place the butter in one small bowl and light brown sugar and cinnamon in another, medium bowl. The recipe called for 1/2 cup brown sugar and 2 tsp of cinnamon. I found that this was not enough to coat all the balls of dough. So I would do 1 1/2 times this amount, or 3/4 cup brown sugar and 1 tbsp of cinnamon. Once the rising is finished, you break the dough into balls and coat it, which in my opinion, is the fun part (other than eating it, of course)!
The recipe said to take the dough and cut it into 1/2 inch pieces. I don’t know about you, but I couldn’t figure where to even start with cutting a huge round piece of dough into 1/2 inch pieces. Very confusing. So, with Hubby’s input (he had finally returned home from work!), we decided to just pull off pieces and eyeball it. We did balls the size of a golf ball. Next time I would actually even do them a little bit smaller. I had totally forgotten that we had to let them rise again. Once they had risen the second time they were a little too big to eat in one or two bites… more like three. Which, I think, for a finger food is too big.
Now you let them rise for one more hour. I know, I know, it’s painful having to wait that long to bake those tasty little brown sugary, cinnamony, doughy things! In case you are dying at this point, the sugar mixture tastes pretty good too ;-)
Preheat your oven to 350F. After the hour of rising, bake them for 30-35 minutes. While it’s baking, make the icing. All it is is sugar and milk. The recipe called for whole milk, but I used 2% and it was just fine. *Tip: When a recipe calls for whole milk, usually you can use any fat content except skim. It just needs some fat to make it work.
And you want to hear something even more crazy (about me)… I’m lactose intolerant. I also have other digestive problems that don’t allow me to eat fried foods and a few other random things. Yup, it totally sucks! And I’m not talking just a little bit, I have a very severe form of it. Like so severe I can’t have any: cheese other than a little parmesan or lactose free swiss (there is only one kind made by Boars Head), milk/cream/half and half other than a small amount of lactose free milk in baked items, any cream sauces at all. If I do eat any of those forbidden items I get very very sick. So sick that I can’t leave my house. And even when I eat the items that I can have a small amounts of I still have symptoms, just not so bad that I can’t function. I know, I know you’re probably wondering why I bake and how the hell I manage with this. I’ve just managed to work around it and have found that it’s really not that big of a deal as long as I’m careful. I also have a few different medications that can help if I do get sick. So, now you know, in all of my recipes that call for milk I use lactaid milk (except cornbread, in which case I use rice milk because it sweetens it up… so much so that the Hubby prefers that cornbread to any other kind). Power to the lactose intolerant! hahaha. I know I’m not the only one, so I hope this helps others who have dietary restrictions. You can almost always work around it!
Anywho… back to the monkey bread: Two minutes after removing from the oven, transfer to a cooling rack. Don’t be intimidated by this step. All you have to do is put the rack on top of the open side of the pan and, with pot holders, flip it over. That’s it! Easy peasy. After cooling for 15 minutes on the cooling rack, transfer to a serving plate. Then, take the icing you made with a spoon and drizzle that tasty stuff all over the monkey! I prefer to do this while it’s still warm because it drips prettier, but you could probably do it once it’s cool too.
Now EAT IT UP! I wanted some so bad that I took a bite before I even took a picture. Bad Jenny! It was SO. FREAKIN. GOOD!
Monkey Bread (adapted from thenest.com)
It said it serves 6-8. I think that totally depends on how much you want. It could definitely feed more.
Dough
1 envelope active dry yeast 1 egg
1/4 cup warm water 1 cup warm 2% milk
1/3 cup granulated sugar 1/4 cup unsalted butter, softened, divided
1 tsp salt 4 cups all-purpose flour, divided
Coating
6 tbsp unsalted butter, melted
3/4 cup light brown sugar
1 tbsp ground cinnamon
Icing
2 cups confectioner’s sugar
1/4 cup 2% milk
To make:
1. Prepare dough: In stand mixer bowl, stir together yeast, water, and a pinch of sugar. Let stand 5 minutes. Add sugar, salt, egg, milk, and 3 tbsp of butter. Attach the flat beater, and mix on the “stir” speed. Then mix in 2 cups of flour in 1/2 cup increments, until a dough forms.
2. Remove flat beater and attach dough hook. Set to speed 2 and mix in remaining flour, in 1/2 cup increments. Continue beating/kneading about 1 minute on speed 2. Using hands, form dough into a ball and then rub with remaining 1 tbsp of butter. Place back into the mixer bowl and cover with plastic wrap. Let rise for one hour.
3. While rising, prepare coating: Place butter in a small bowl and melt in microwave. In another medium sized bowl, stir together brown sugar and cinnamon. After coating is ready, prepare the pan. Grease a bundt or tube pan well. (I used smart balance butter from tub, but you can use any kind of butter.
4. When the dough is finished rising, remove from bowl and place on cutting board. Pinch off dough and roll into balls a little bit smaller than a golf ball. Just use your best judgment… you won’t mess it up. Coat balls in melted butter then roll in sugar mixture. Place in prepared pan as you go, with balls touching in layers (you will have 2-3 layers). Cover with plastic wrap and let rise for one hour.
5. While rising, prepare icing. In small bowl, stir together confectioner’s sugar and milk until smooth. Then, preheat the oven to 350F. Once ready, bake for 30-35 minutes. After two minutes of cooling in pan, transfer to cooling rack. Let cool on rack for 15 minutes then transfer to serving platter. Immediately take icing on a spoon (you may need to give it a little stir) and drizzle all over the monkey bread.
ENJOY!
Subscribe to:
Posts (Atom)


